In late April the son of the former owner sent me an email mentioning that his Dad was cleaning out the garage and found some parts I might want and to give him a call which I did.
To refresh the story I bought this car back in the summer of 2003 after sitting on Craigslist for several months and apparently the only person to show real interest. The owner was selling his Cougar and going to get an older BMW. Well he did get a 91 convertible if I remember correctly. However, he spent the years after restoring his original purchase Datsun 260Z and I’d really like to see that car’s story.
We decided to meet not far from where I live, just off 680, as he was going to drive from San Jose to Colorado to drop off things for his daughter. He drove up in this which you can see behind my Parklane.
So we get out and say hi and it seems Don is surprised to see that the Parklane is alive and well. He calls his son, up in Seattle I believe, about the meeting and his son asks him to take pictures even though Dad says you know the car. Now having a sharp eye he noticed that the carpet was replace as it was a slightly lighter green compared to the old. After some cit chat he pulls out a box from the back of the Trans Sport. In it are some small odds and ends which are Mercury related but there are also several power window motors that can be useful. Two of them worked well so I cleaned them up, greased them, got a new wheel for one and stored away.
After about 45 minutes he had to get on the road to make his next scheduled stop hours away. So he hopped into the Trans Sport to continue on his way.
Now I did mention that the car now had a 1 1/8″ front sway bar now.
Over the summer I finished the rebuild of the rear suspension. I had originally done the two lateral arms last year when I removed them and installed new bushings. I got stopped when I tried to remove the upper control arm as you can see in the picture. Not a great place for the muffler shop to stick a muffler brace back in 2004. So while I pondered how to remove it I ran across upgrade parts for the 65-68 Galaxie/Mercury. Stronger arms with little flex and polyurethane bushings so I splurged and bought them. So the lateral arms came back out and the new ones went in.
The driver’s side is extra hard because the access to the nut is shared with an emergency brake line. So I had to take an old spare 11/16″ open end wrench and grind it down to half the normal thickness to hold the nut in order to remove the bolt. The nut then falls into the space with no access except for using a magnet to pick up the nut, hold it in place, and push the bolt back in to intercept the nut for threading. Below you can see I tried getting the nut in place by using sticky stuff on the wrench to hold the nut but it fell off where it couldn’t be reached in the end. So cue the magnet although the first time I did this side I did manage with the open end wrench.
Now I knew I had to cut out the bolt that I couldn’t fully remove but how. My sawzall wasn’t a good option as the blade just bounced around on the hardened bolt. My 4″ angle grinder couldn’t reach the bolt because the snout hit the bracket. The only way was to remove the guard and insert a 6″ cut off wheel and to be very careful. Still could only get half way through before bumping up against the frame so that meant rotating the bolt and cut again.
As one can see the bushings were pretty worn.
Last was the panyard arm. Getting it out was straight forward. However, the bolt assembly on one end needed to be removed and I quickly determined I needed something strong to hold one side of the assembly while I removed the nut on the other side. Since I am on the USS Hornet every Saturday I get to use the machine shop and the big vices down there. Once off and back home I can transfer that part to the new panyard arm. That bolt on the right side was really torqued down.
Now placed into the car. While working under here I also replaced the broken axle vent house.
With everything in it was time to drop the car to let the new arms settle in before torquing them down. Test ride would have to wait for another day and that was a week day where my son got off from school at 11:45 meaning no traffic on the freeway. The difference in ride is not apparently when driving straight down the highway but on a lane change or the big sweeping 180 degree exit it was apparent the car had much less lean. I could go through the trouble of adding a rear sway bar but why bother when I am not really going to be ever whipping this car around curves. It isn’t a muscle car, despite what some others like to say, it is a freeway cruiser. It does that very well as I found a wide open spot on the way home and my son said you are doing 100. It is that smooth and quiet that you really aren’t aware of how fast the car is moving. Compared to my 73 Polara where you can tell you are going that fast with all the rattle noise made by the typical Chrysler quality back then. Can’t speak for a 1967 New Yorker but the big Mercury is absolutely devoid of any noise from the suspension or car. This is a great car to drive.
Funny thing on picking up my son from school. The school is in Alamo and there is nothing in Alamo that is less than $1.5 million if not higher. So all the cars are either Teslas or some high end CUV and SUV. So I pull up in the 67 and all the eyes left focus on the car and then my son as he gets in. I felt a little bit like Uncle Buck. The car does have a very faint wiff of blue smoke, probably valve seals, so an engine rebuild is soon due with 153,000 miles. Now under cover just in time for the Big Rain.













Great 1967 Park Lane, and if you were to pull up in it, I would focus on it, too!
I hope you did OK in the Big Rain. My rain gauges, capacity 5.5 and 7 inches, overflowed twice in three days. The swale behind us, however, did not turn into a river this time.
Teslas are about as déclassé as Mercedes (DMV code MERZ, not MERC which you know!!) these days.
Very nice! I think your observations about FoMoCo cars vs. Mopars of that general age range are accurate. Ford was very good as isolation and sound deadening and Chrysler, for all of their cars’ other charms, was not.
The Mercury is based on the body/frame design from 1965. The body was much stiffer than before and rubber mounted on the frame at a lower number of spots, determined by being at the points of least frame vibration/flexing. The Chrysler products were unit bodies since 1960.
As time went on car makers figured out better ways of isolating unit bodies from NVH. Yes, you can easily perceive the difference between big Ford and Chrysler products from back then. Everyone in my family’s favorite family car was the 1967 Galaxie, probably partly because of the quiet and isolation. Also red and a very good looking car, the sort of copied from GM roofline going well with the body.
Oh yes, I am very familiar with the 67 Galaxie. Even though I was just a high school kid I could tell that the car was much smoother and quieter than the non-Ford cars my friends drove.
The remarkable thing was how they designed that body and that frame to work together in forming a structure that was extremely stiff for a BOF car. No later generation of big Ford (after the 69-70 update) ever managed that level of structural stiffness again.
The word I was looking for re the body mounting points is “node”:
1 a point, line, or surface of a vibrating body or system that is free or relatively free from vibratory motion
2 a point at which a wave has an amplitude of zero
I don’t think anyone had thought about the frame twanging in major and minor waves before, but it would.
Besides the coil rear suspension I think the 1965 redesign also introduced integrated into the box power steering (which Chrysler products always had) and fully integrated AC (which GM and Chrysler also already had). The power steering did feel too heavy to me, but not for example on my ’62 Lincoln.
I’ve only driven certain cars and most a long time ago. I don’t see many modern reports with serious driving impressions of cool older cars. Mostly just ooing and ahing over their design, and Jay Leno saying it drives like a modern car (except for the giant steering wheel still needing a lot of strength to turn, fading brakes, engine noise, split windshield, no mirror on the right, hot or cold interior, tipsy handling….)
Collectible Automobile never has anything on actual driving the cars.
Very nice ‘67 Galaxie. 390 4bbl? Far quieter and a nicer interior than Impala and Fury.
I have to agree. Mom’s ’68 Country Squire was dead nuts silent, as was my brothers ’71 and ’74 F-250 4x4s. The only thing you could hear in the trucks was the gear whine from the NP435 transmissions
Carbide reciprocating saw blades are usually pretty good for cutting through hardened steel. Not cheap though @$10 per blade.
Nice, period color combo on that Park Lane.
The undercarriage of your Mercury looks pretty good. It’s nice to do a few improvements on an older car that improve the roadability. It appears that you’ve got quite the collection in your driveway. I’m in your general neck of the woods, and also got quite a soaking. It’s my priority to keep water from getting through the old weatherstripping on my old fleet. I’ve only got one of my cars in the garage.
I’ll wait to see if Don is able to post yet because he has a sad story to tell about that Pontiac Trans Sport after he left me.
It is a bit stunning to see the original pressed fittings compared to the upgrades. No wonder they flexed with that basic structure. I’ve seen a few top hat section wishbones on British cars that people weld plates to.. Technically illegal but the benefit is immediate..
Is it because a cost benefit standard has been applied?
Enjoyed the history.. thanks
“Is it because a cost benefit standard has been applied?”
Cost benefit standard applied to an old vintage car? You must be kidding as who does that? 🙂
I had already done the two lateral arms and had two sets of bushings for the upper. These four new arms cost me just under $500 so I would have to say the old version beats that at $50. It is just when I started on the upper and remembered my issue with that one lateral arm I thought do I want to do this again when I am 80? The answer was no so lets make this more lasting.
Wow, what a nice survivor ! .
I see the new traction bars have grease fittings, will you need to use silicone or other special grease ? .
I also assume this allows a total four wheel alignment, that should make it an ever better freeway cruiser .
I’ve been fitting red Polyurethane bushings every were I can for twenty some years now, no increase in NVH and always better handing .
-Nate
Super Lube is the recommended grease at 1-2 pumps a year. Given my driving more likely every two years at the most.
Don’t you know the base of Super Lube ? .
I agree that doing it right the first time even if it hurt$ my wallet is the way to go .
-Nate
A synthetic grease with PTFE providing better anti wear and is waterproof as they recommended.in their instruction sheet.They were already prelubed with that grease when I got them.
Ah, _HA_ ! .
Thank you .
-Nate
TBM, that is one clean Mercury!
I’m not sure if a Ford window motor ever failed. lol
Although the three cylinder shaped drive lugs (visible in the lower motor) used to deteriorate.
Make sure the oil pan isn’t making frame contact at times. Sure looks close.
And lastly… I’m wondering why not unbolt the exhaust hanger and move it aside a bit for bolt removal clearance, rather than cut off the bolt?
” I’m wondering why not unbolt the exhaust hanger and move it aside a bit for bolt removal clearance, rather than cut off the bolt?”
As text notes, the hanger was not bolted on at the factory. The problem occurred when a muffler shop welded a universal bracket to the underside of the vehicle. The 10th picture down give provides the best view of the situation.
I saw the plug weld, I assumed that was to a threaded stud?
You’re saying the bracket is plug welded to the frame?
Whatever, we better move on.
Garrrrrgh, those stoopid box-and-rod muffler brackets. They do a lousy job of isolating noise from the passenger compartment, and (as you note) they get in the way of stuff.
So true. When I did the Cougar I supplied correct new hangers which are available. The F100 and Polara were also supplied with the correct hangers courtesy eBay. The Mustang naturally had the complete correct exhaust available and I installed that one myself. The Parklane had no NOS available plus I was not paying super close attention as we were converting to dual exhaust and deciding whether or not resonators were needed.
@tbm3fan :
Could you flesh out what you did with the exhaust ? .
I rarely have engines that can use twin exhausts but those few I tend to add a crossover and find it helps modulate sound as well as mid range RPM power…
-Nate
Told the shop I wanted a 2″ dual exhaust. First thing they said was 2″ and I said yes as calculations for stock engine cfm flow say that is fine. The manager agreed with me and said everybody asks for 2.5″ and he was amazed someone knew what was correct. I also told him where I wanted the cross over pipe since all Ford dual exhaust cars that I knew of had one. The only question was resonators as that tended to be typical in these cars. I said no, he said it might be loud, but in the end it was just fine when the car was started. You don’t hear anything in the car but at the back you don’t hear silence but the very faint rumble of a large V8.
@ TBM3FAN :
Thank you .
That doves tails with what I have experienced and what an Engineer at Goerlich (? SP ?) Exhaust told me many decades ago .
The crossover really helps take the nasty noise out of twice pipes along with better scavenging if you place it correctly, few do .
-Nate
Those are some fancy components…that Park Lane must handle better than it has any right to handle. I’d be looking into valve seals first before rebuilding the engine; they’re cheap and not that hard to do. The way I always look at it: At 1000 miles a year, there are probably a lot of good years in that engine, and you can always do the rebuild if the seals don’t work. Nice car!
Agreed on replacing the valve seals. The ones on my Malibu have disintegrated due to age. I am planning on replacing them even though eventually I plan to rebuild and upgrade the engine. Since “eventually ” is yet to be determined, I figure I will do this cheap repair in the meantime.
This has crossed my mind using my spring compressor and the rope method. However, generally an engine emitting faint blue smoke while sitting at idle would more likely be the rings vs blue smoke at start up. Years ago I did have the shafts off in order to put #80 Holley jets into the feed hole for the upper end so as to keep more oil down below. Typical of an FE to send more up top than you need. I’m watching the plugs and so far they look good as they get 13V when running.
Nice upgrades to the Merc. The nice thing about these aftermarket control arms is that they allow for adjustable of the pinion angle. On the 4-link suspension on my Ford, the factory actually had mini eccentrics in the bushing centers to allow for pinion angle adjustment. However, all aftermarket replacement bushings don’t incorporate these eccentrics.
The trend with the aftermarket today is to stiffen up the control arms and add poly bushings for better rear suspension control. However, one has to be careful not to go too stiff or you might have suspension bind which can lead to snap oversteer. The rear multi-link suspension from this era had natural suspension bind due to its geometry. The OEM overcame this with soft bushings and flexible parts. So if everything gets too stiff, the suspension will not articulate under all circumstances due to bind. Some aftermarket solution us to use spherical bearings in place of bushings, but these can introduce quite a bit of harshness.
The upper control arm had the eccentric bolt assembly which stayed once the new arm went in. Placed it back in it’s original position and the arm was set for the stock pinion angle. Being your prototypical cruising driver in this car I should be ok. When it comes to pushing the limits of handling that is what the Focus is for.
I agree, you should be fine on your car, especially if there is no driveline vibration. The design I was talking about had the eccentrics built into the center of the bushing, which is different than what is on your car.
My commentary on the aftermarket suspension was just that so many people believe that bolting on all this new stuff will make things better, but if you aren’t careful things can get worse in some circumstances.
Well I’ll relate Don’s story after he left for his drive to Colorado in the Trans Sport. I believe he dropped off his daughters stuff and then was camping around in the general area. He was driving through Grand Junction and was going to pass a car. Now the van had been making some engine noise during the trip and when he hit the gas to pass the car the engine went BANG.
He pulled over at 1:00 AM via an exit and got out to take a look. The underside and road was covered in oil. There was a hole in the block. He said the engine would idle but it wasn’t pretty. So he spent the night in the van and in the morning got a tow to the tow yard. There he called his daughter who came out to pick him and his stuff up. He left the pink slip with the yard. When I asked how he got home he told me he drove. His daughter was getting a new car and were going to sell the 260,000 mile 1997 Camry which he bought and drove back in.
He said he loved that van and all that it could do.
1. OEM-style rubber bushings are bonded to the steel inner sleeve and the steel outer shell. When installing parts with rubber bushings, the vehicle must be at normal ride height before torquing the through-bolt in the middle of the bushing, or the bushing can become over-twisted at suspension-movement extremes. Then the bond breaks–usually at the inner sleeve–and the bushing squeeks from then on. It also does no good for the location of the component and can lead to handling abnormalities. But Polyurethane suspension bushings are not bonded; they’re free to rotate within the shell, and on the sleeve. So those bushings can be torqued with the suspension in any convenient position. There’s no need to let the suspension “settle” before tightening the bolts. Ease of assembly is one of several reasons I don’t often use rubber bushings if I can get Polyurethane for the application.
2. In terms of body-on-frame rigidity, it’s miraculous what fresh body-to-frame cushions and hardware can do. The body supplies most of the vehicle rigidity–the frame is little more than a huge and dreadfully flexible “bracket” that the suspension and steering bolt to. It takes coupling to the 3-D welded body structure to really stiffen the car. These older vehicles have collapsed rubber mounts and rotted hardware–mild steel bolts and washers. Fresh hardware and new rubber–or Poly–bushing make a tremendous difference. When I upgraded my ElCamino to Poly body bushings, I could tell the vehicle was more rigid as I was taking it off the jack stands! The frame didn’t flex when the jack lifted the front crossmember.
3. As said already, those “hat section” trailing arms are DELIBERATELY flexible in twist, but fairly strong in compression and tension (except for bushing deflection, and eventual failure as seen in the photos.) This is to prevent suspension bind. The replacement “Hot Rod” suspension links shown will have considerable torque on the threaded middle section as the axle articulates, make sure those jam nuts are TIGHT.
4. If handling is any priority, (and on a “highway cruiser, it probably isn’t) the biggest improvement is not front and/or rear sway bars, it’s stiffer springs. The OEMs tended to use tall, soft springs which ride smoothly but suck on corners. Shorter, stiffer springs can give the identical ride-height; but will corner far better. Then add the sway bars to tune the under/oversteer characteristics to suit.
5. “panyard arm”? Panhard arm. Named for the French early-automotive guy, supposedly pronounced “Panar’ ” but nobody in America does.
“The replacement “Hot Rod” suspension links shown will have considerable torque on the threaded middle section as the axle articulates, make sure those jam nuts are TIGHT.”
Every jam nut was sealed with Loctite
You’re right “panhard” as it is on my sheet in my hand but sometimes when I type quickly either I place the second letter first then the first, or I hit a key adjacent to the one I want and it can slip by if it looks right at a glance.
I know tbm3fan — we belong to the same car club, so I’ve seen this ’67 Park Lane a few times over the years. It’s a really great example, loaded up with most of the options of the day, and in wonderful condition. So I too am glad he does such a great job of maintaining it!
Decision time has come like it does for those who own an older car. Last March the left exhaust manifold cracked completely in half. The four top bolts were not coming out. What else is new? So the head needed to come out which meant the intake had to come off. Neither could be called light. With 154,000 miles might as well take off the other head and examine everything.
This didn’t always work
Here is the intake
Was this thing ever coked up underneath
So do I spends the thousands of dollars to rebuild this engine so I can drive the car another 20,000 miles in my remaining lifetime?
Heck, yes
Well this went easy with all that weight off. Still a mighty heavy engine.
Given the cost of machine shop services, the enormous reduction in open-for-business automotive machine shops, and the still-problematic sourcing of parts ever since the Wuhan Plague, your best bet MAY be to purchase aftermarket aluminum cylinder heads if not an aftermarket aluminum intake manifold. You’ll also lose substantial weight high-and-forward which will be very beneficial to the vehicle dynamics.
I understand that you’d probably want to keep iron exhaust manifolds. Not my first choice, but perhaps yours. I don’t know if “new” reproduction exhaust manifolds are available, but if they are you can count on having to get them planed flat and smooth at the machine shop. Out of the box, they’ll be warped, rough, and potentially with internal casting flaws that interfere with gas flow. My machinist says the “new reproduction” exhaust manifolds from Viet Nam are even worse than the ones from China.
Photo of a “new reproduction” Chinese exhaust manifold with cast-iron “booger” in the runner.
Parts are not an issue for me as I already had collected over the last 20 years the pistons, mains std. and 0.010, connecting std. and 0.010, and cam bearings. Have an NORS Melling oil pump and water pump. The trick is finding a camshaft as many seem to be out of stock for even stock cams but have NOS Ford lifters.
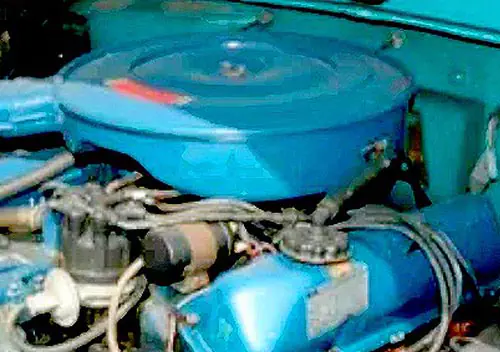
The intake is staying original and has been already finished. I learned a method for painting the intake, or block for that matter, that will last and I doubt many know of it. Too bad. First you need a propane torch to heat the cast iron and sweat out all the water still present and it is present. You can see it in the picture. Deserves a story but you can’t get it.
Now the part is ready for the first paint. Two coats of Rustoleum Rusty Metal Primer.
Finished
Now followed by two color coats. Believe it or not but Rustoleum Royal Blue is a really close match to Ford Dark Blue.
Should note port matching was done before painting.
Cool technique. Didn’t I say that?
Oh, yeah. VERIFY THE ALIGNMENT OF THE OIL HOLES IN THE MAIN BEARING SADDLES vs. THE HOLES IN THE BEARINGS. The FE engines are infamous for misalignment. Some time spent with a die-grinder and a tapered rotary file to oblong the hole in the block is time well-spent.
A guy could also elongate the hole in the bearing, but doing the block is permanent, doing the bearings has to be done at each bearing change.
You are talking about this so I’ll post a picture so people know what you and I know. You are getting ahead of me as I am working in a line: exhaust manifold set, intake, heads, crank, and then block. Crank is at machine shop as of yesterday. Will update 10 hours from now on all that has been done.
Thank you for all the detailed updates, explanations and pictures .
When you heated the exhaust bolts up, did you quench them right after heating ? .
-Nate
No I didn’t quench them after heating as my research showed opinions varied. So in the end I was 5 for 8. The machine shop took the three broken ones out at no charge. Of course rebuilding the heads wasn’t inexpensive. New valves, new seats, new guides, and new springs to handle any lift to 0.500″.
Biggest issue was one of my original heads was cracked between a valve seat and the spark plug hole. That led to a two month search for a replacement given the different sizes in the combustion chambers. I have a 10.5:1 ratio so I needed to match the other side. Thought I had one from Minnesota which turned out to have a bad eroded spark plug hole. The machinist then remembered he uses a 390 head to mocked things up and brought it out. It was close enough so he swapped the damaged head with me and now I had a pair.
Nice ~ I especially like the new rockers and shafts, so few bother and they help the quietude of the engine .
Using a Hot Wrench properly is another lost skill it seems .
The idea is to heat up one part of the frozen threaded thing then quench it quickly to break the bond between the two threaded parts .
In the field I use water and plenty of it, in the shop I use my favorite penetrant .
Either way it works a treat .
Of course you must be cautious when applying force to not twist it off .
You’ve done very well here, looking forward to seeing how it ends .
-Nate
I soaked those bolts for two weeks with my 50/50 mix of Type 3/Acetone. Did it several times and worked like a charm on one side but not the other. Tomorrow I’ll remove the pistons from the rods. All looked good with no wear signs on the skirts.
The main caps show their wear.
Most wear in the middle, much less on each end.
I guess she’ll be getting an align-hone.
You’ve done very well here, looking forward to seeing how it ends
You will have to see it here since I have been told I can’t submit anymore stories on any topic be it cars, planes, or ships.
They looked really nice.
Over the last 10 years I acquired new shafts, new rockers, new stands, and new springs to make all new rocker assemblies. Found the parts on eBay for a fraction of the cost. You should see what new shafts costs from current suppliers.
Looks good in Ford blue.
Rods and pistons separated this past weekend. Gave me the chance to weight the pins that came out and were in excellent shape. Reason being that new pistons had a variance of 3.5 grams and being aluminum I didn’t want to remove material from them. The new pins were all 150 grams but the removed pins were 146-148 grams. Mix and match enable three pistons/pin assemblies to match and five that needed from 0.8-1.2 grams in reduction. That will be done by chamfering around the inner edge of those pins. Once the rods are checked out they too will be weighed at both ends. Goal in the rod/piston assembly is less than 0.5 grams of difference or less.
Interesting in looking at the bottom of the pistons I can see 1-4 are dry while 5-8 were wet looking with oil. Also got some practice in removing rings for when I need to insert rings. Snapped the first few on the second land.
I would think a story on the rebuild of an FE big block would make more sense, like your other stories, than posting at the end of this suspension story where few will see it.
Can’t. Not allowed to submit anymore stories on COALs car shows, or repairs of cars, planes, or ship. Had five done and two in the works when access was taken away.
What? Isn’t car stories and care of cars part of what this is all about? What is the reason?
For over six months he failed to respond to emails from Rich and myself. We wasted a huge amount of time trying to contact him about issues with his submissions. We cannot work with contributors that are not responsive. We’ve never had this issue before. Many unanswered emails from both of us.
I would like to see this thread end now. A note to tbm3fan: griping about the site and its management in the comments goes against our commenting rules. If you want to gripe, do it in a private email. Oh right; that doesn’t work for you. Sorry.
” If you want to gripe, do it in a private email.”
https://www.curbsideclassic.com/contact/
“Error: Contact form not found.”
HOW would I contact you? The “contact” section of the web site doesn’t work.
He has our email address. It’s curbsideclassic@gmail.com
The Contact Form will hopefully be fixed soon.
Thanx for the detailed explanation Paul .
Like it or not, when you’re on someone else’s site you need to follow their rules .
-Nate
Oh right; that doesn’t work for you. Sorry.
A little smarty don’t you think? I’d bet there were shortcomings on both sides as that is usually the case in most things.
Anyway being in the Bay Area and on Museumships I was invited down to the USS Hornet for a behind the scenes, not seen by the public ever, spaces on the ship in the next few weeks. Frankly anyone who dedicates 26 years to resurrecting this famous aircraft carrier is Ok in my book. You can see the work, search Hornet, if your interested.
Just so people know there are always two sides to a story. Searching my 2023 emails, of which there were just under 11,000 I found two from curbside. Then scrolling through the months of August and September I found one from Paul not labeled curbside and was missed. Since I can sometimes log in and find over 100 emails I tend to mass delete. The same happens to my office email account. Cookies and trackers are evil.
Looking though sent, a lot easier, I find six sent out to curbside.gmail in August, October, November, and January from my account. I have the exact dates. I knew what the issue was but none of those were ever responded to. Must not get emails. Sorry.
Now back to the FE oil modifications.