It’s been nearly two decades since I took ownership of my Torino from my Dad and for the last decade I have been slowly refurbishing the car. The act of refurbishment has always made my bond with a car much stronger. Not only does my Torino have countless memories, it’s my hands that have put this machine together and carefully assembled it to bring it back to its full glory. After years of thinking how I’d rebuild the engine, the time had finally come in the fall of 2017. I had always tried to keep the projects on the Torino relatively small so I didn’t have to lose out on a driving season with the car. However, this particular engine rebuild project suffered from some significant project creep resulting in a much longer than usual project.
From my first ride in a fast car, I have long been fond of speed and power. When I was young, I was more into hot rods and street machines than stock cars. Burning rubber and driving fast was all I wanted to do. As time has gone on and I have matured, so have my tastes. Today, I have a much greater appreciation for stock vehicles, nevertheless, my love for speed and power remains. Having a 1972 model year car meant that my engine was far from the pinnacle of 1960s and 1970s unfettered performance. On top of that, while my 400 in stock form was reasonably powerful, it wasn’t a high performance engine even by 1972 standards.

Much like a 1972 Torino, the Ford 400 is often maligned and unloved by many. As the owner of both, I always thought that the reputation was highly undeserved, at least in the case of my particular iterations of both. Being a big fan of the 335 series engines, I was well aware that the Ford 400 was an inherently good design, but was poorly executed. So the last thing I wanted to do was to rebuild it back to bone-stock specs.
My game plan was to build the engine to appear stock, but I would perform a number of subtle upgrades to address the shortcomings from FoMoCo’s original execution. While many engine builds today resort to stroker crankshafts and modern aluminum cylinders heads to make serious power, that was too far from original for me. I knew that I could easily make my 400 a much more powerful engine with mostly stock parts. It was also important to me to keep most of the original parts that had been with the car since day one.

So in the fall on 2017 I parked my Torino after taking one last gratifying ride and parked it for the season. Shortly afterwards, I pulled the engine out of the car and shipped out it to Fairmont, Minnesota. There it was left in the expert hands of Tim Meyer of TMeyer INC. Tim Meyer is well known in the 335 Series engine community, as he has specialized in these Ford engines, in particular the 400s.

One of the biggest problems with the Ford 400 engine is the piston design. The stock 400 piston has far too much deck clearance which causes all kinds of detonation problems if one tries to increase the compression simply with smaller chamber cylinder heads. TMeyer makes has an exclusive piston for the 400 that addresses these problems and also increases the compression to a much improved but street friendly 9.3:1. I also knew that TMeyer’s machine work was second to none when it came to 335 series engines. They also make modifications to improve the oiling system, including custom camshaft bearings.

After the tear down, the block was stripped and cleaned, while the cylinders were bored with a 0.030” overbore. The stock crankshaft and rods were refurbished, and the new high compression pistons were installed. The entire rotating assembly was balanced and while all fasteners were replaced with ARP hardware. Along with the increased compression, the camshaft was the other key area that where I could increase engine power. The stock 2V heads actually flow quiet well, but a decent induction system and camshaft are needed to properly utilize the flow. The stock camshaft is very mild with short duration and low lift. I had already upgraded the induction system prior to rebuild with a Holley 4-bbl carburetor and an aluminum intake manifold. So I chose to upgrade to a roller hydraulic camshaft for improved durability and the ability to use a modern cam profile. Tim Meyer designed the custom camshaft profile that had a little more duration than stock, but significantly more lift. This camshaft was specifically designed to have excellent drivability, and strong low end power, but vastly improved breathing and high RPM performance.

The stock cylinder heads were rebuilt with all new valve hardware and one piece stainless steel valves. I also upgraded to rollerized rocker arms to reduce valve train friction.
TMeyer did the assembly on the long block before shipping it back to me for final assembly. The engine was run an engine sim tester prior to sending it back to ensure all was assembled correctly. Overall the engine build took longer than I had originally planned, but I was okay with that, as Tim Meyer prides himself on quality work over speedy work.

While the engine work was being done in Minnesota, I was busy working away on other parts of the car. With the engine out of the car, I decided it was also time to freshen up the transmission. The C6 is very strong in stock form, but with the new found power I figured some upgrades were worthwhile. I bought a 500 hp rebuild kit from one of the most respected Ford transmission shops, Broader Performance in Texas. I also upgraded to a more performance oriented torque converter with a slightly higher stall speed to compliment the new camshaft.

Along with the mechanical refurbishment, I also wanted to restore the engine compartment. While I was very lucky to have a completely rust free 1972 Torino, it came at a cost. Not only was it undercoated when new, but the car had annual oil spray rust proofing. This perfectly preserved the car, but it made for a dirty oily mess under the hood. Quite honestly, I was sick of getting covered in grease whenever I did something under the hood.

I decided to disassemble the entire front clip to properly detail all the parts. The front end sheet metal on a ’72 Torino is far from a simple design, especially compared to modern cars. So, I took lots of photos and bagged and tagged all parts to make sure I remembered how to assemble it correctly.


After the front end was torn apart, all components were removed from the frame and I stripped the undercoat. The frame was in excellent condition and required no rust repair. I repainted the frame in a semi-gloss black as originally done by Ford. I had to remove the brakes lines and combination valve restore the frame, so I decided the combination valve might as well be rebuilt too. The radiator support, the wheel houses and various other brackets were sandblasted and powered coated.

Next up was tackling the firewall. After another lengthy and dirty degreasing, I found the paint underneath was actually not in too bad of shape. It probably could have been saved. However, years ago a big chunk of seam sealer fell off the firewall and took much of the paint around it with it, meaning a repaint was in order. I stripped firewall and replaced the seam sealer with a more advanced modern product. I shot it the firewall with an epoxy primer and followed it up with some new 2B red paint.

The fender aprons were also covered in undercoat and after the lengthy task of degreasing them, I decided to repaint the aprons to match the firewall. I was happy with the end result, especially considering I am no body man.
Along with doing all these bigger jobs, I also cleaned and detailed all the other small parts that were removed, which was some of the most time consuming work. The brake booster, every bracket, every bolt was and even the brake lines were stripped, cleaned, painted and detailed. Along with that, all the wiring harnesses were also cleaned and detailed.
Once I got my engine back I needed to complete the final assembly. Since I wanted to keep it stock appearing, I restored and reused the original stamped valve covers. I also painted all other engine parts in Ford blue paint to match, including the new oil pain, the aluminum intake and the restored engine timing cover.
I finished the assembly of the engine on the stand before mating it to the freshly refurbished transmission. One other concession I made was long tube headers. If I wanted to fully take advantage of the new camshaft, not only did I need the freer flowing induction of the aluminum intake and Holley 4-bbl, but I also need an exhaust that was free flowing.
I installed the engine and transmission into the car without the front clip and then I fitted the headers, which required some minor clearancing on the driver’s side. Once that was done they were sent to be ceramic coated and I reinstalled the cast iron manifolds for the initial break-in run.

This was also when I built my new ignition system. I purchased a prototype distributor from Tim Meyer, which was a Ford Dura Spark distributor that was specially fitted with a GM HEI module. I ended up using an e-coil from a circa 1993 5.0L Ford Mustang which works well with the module. After wiring up the new ignition the engine was read to fire.
The break-in was uneventful for the most part, other than the aftermarket fuel pump diaphragm failing. It was later replaced with a stock style pump, as I was not happy with the poor quality of this aftermarket hi-po unit.
With that, final assembly began on the body began. The engine was lifted and so I could get the new headers installed. All of the front end sheetmetal was installed. While somewhat time consuming, it went back together without too much difficulty. I was fortunate to have the help of a friend who formerly worked as a bodyman to help get the massive fenders installed and aligned. All said and done, the whole project ended up taking considerably longer than initially anticipated, and I missed the 2018 driving season. I was okay with the lost season, as I am a weekend warrior with family obligations and I ended up doing more work than I had initially planned.

So at the end of last summer the time had come, to bring the Torino back onto the road and start the break-in miles. The new engine is very strong and I am very impressed with the power but also its excellent driveability. With the short driving season, and my busy schedule, I didn’t have a lot of time to drive the car, but I wanted to do a minimum of 500 miles on the engine. I was able to surpass my goal and logged about 800 miles in total. I was even able to take the kids over to visit my Dad so he could see the new engine.

This winter I decided to keep things simple and tackle smaller jobs on the car. The new found power resulted in the original Trac-Lok limited slip on the 9” differential starting to get weak. So the differential was pulled for new clutches and to freshen up the bearings. I also am working on restoring a factory air cleaner with an auxiliary air door to match the newly painted engine.
There are still a few more minor jobs to finish up on the car once I take it out for this driving season. I have to bring it to the exhaust shop to have an entirely new system built and installed. The current system is too small and I kind of cobbled it together to connect it to the headers. I still am working on tuning the carburetor, and plan to use a wide band O2 sensor to get it dialed in really well. Even with the carb not being perfectly dialed in and the engine being green, I still managed 15 MPG (US), which I thought was respectable.
This was the biggest project I have done to my Torino and overall I am very happy with the end result. While my car has never undergone a full restoration, I have been slowly refurbishing it over the last decade to and made it into something I can be proud of. There is almost nothing on this car I haven’t touched, disassembled, cleaned or refurbished. So this Torino has not only become a part of my personal history, but I have become part of it as well. Here’s hoping to many more years of enjoyment and memories.
Related Reading:
Auto-Biography – 1972 Ford Torino – A Tale of a Torino, Fathers, and Sons: Part 1 Part 2
The Ford 335 Series V8 Engines (351C, 400, 351M) – It Could’ve Been a Contender: Part 1 Part 2




It’s not yours until it makes you bleed! 🙂
Nice work! The 400 is an interesting engine. If Ford would have introduced it in 1968, it probably would have an entirely different reputation.
I have to agree. That whole family (335) of engines was born about 5 years too late.
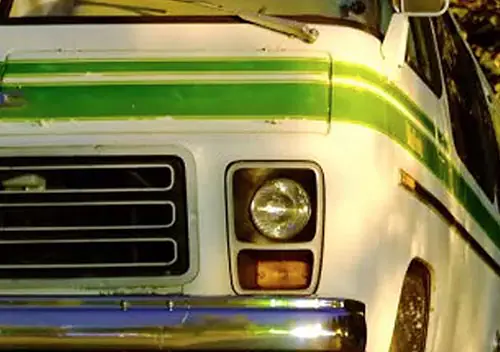
The part I like best about your car is the choice of period-appropriate BFG Radial TA’s. I see so many ‘60’s and ‘70’s cars with tens of thousands of dollars of repair and restoration, fitted with off-brand white letter tires that just scream “cheap”. Sure, we used those at that time, but that was due to budget, not intention. But the rest of it is pretty nice too! And I will admit to not liking these cars when new (I was a high school senior in 1972) especially the “laser stripes”. But it looks good to my eyes now. That grill seems so modest compared to a modern Toyota or Lexus.
I agree, I dislike off brand tires too. RWL tires are hard to find these days, with BFG Radial T/As being one of the few choices. The car originally came with Goodyear Polyglas G70-14 tires on Magnum 500s (see them on the steel rims on one of the pics above – they are not roadworthy). I upgraded to 15″ wheels about 10 years ago, but I still have the 14″ Magnum 500 wheels which also have a set of BFG Radial T/A/s on them.
My ‘73 Vega came with Goodyear A70-13 bias/belted tires and I replaced them with off brand RWL BR60-13 radials. Looked cool but everything about them was awful. After a couple of flats I traded them for a set of used 185/70-13 Pirelli and added various other used Euro brand 185/70’s, even the low-performance Michelin XZX outperformed the wider and lower profile off brand tires in every way.
Speaking from long experience, the two hardest things to sell is tires and batteries. I always explained how a Michelin tire would transform how the car drove, how they were safer and how they were a better buy despite the price.
Very few took this advice.For every good tire, like a Uniroyal Laredo (a very under-rated tire) I’d sell a dozen sets of Autopar. That’s even assuming I could sell them which was a 50/50 a best.
Straying from the topic, selling batteries was the second hardest. We’d have the thing (almost always a lady in a Jeep) in for service and I’d call her, “Ms Smith, the battery in your Jeep is weak and will quit as soon as it got cold.
Low and behold I got a call on a chilly morning. “My car won’t start.” My reply was, well, I told you that you need a new battery,” The reply was always the same: “Can you come fix it?”
Fantastic job, Vince! You started with a well loved, rust free car, did your research and took your time to do it properly. As you say, working on a vehicle makes it much more than just a transportation device and the connection with your father makes it irreplaceable.
Must be one of the best Torinos around – this would definitely hold my attention if I saw it at a show.
What was your dad’s reaction? I’ll bet he was touched to see his old car again!
I always love these stories of your Torino, Vince.
You have some serious skills, and I must admit I’m a little jealous. ;o)
And it would seem that you have struck a nice balance between what you do yourself and what you farm out to others.
So, did the car smell like a new car during break-in as the new paint on the engine heated up as you were driving it? I’ll bet that new car smell was a surreal experience in a car from 1972.
I like the picture of the newly machined cylinder heads with your name written on them with a blue Sharpie.
So if Carlisle’s Ford even isn’t canceled, are you going to drive her down? I’d make the trip up there to see it in the metal and meet you. ;o)
Thanks Rick. If I do make it back to Carlisle, I will definitely let you know. I am thinking the chances this year are slim to nil though.
That’s a lot of work, and it looks great. I hope Dad is proud!
Weekend warrior you may be, but the results say “pro” all over!
There is no greater feeling in the world than getting to drive a vehicle that was built by your own hands, and even more so in a car that has the family history that your Torino does.
It looks fantastic and Im sure it drives great. I’ll bet that 400 pulls hard. Any plans to take it to a track for a timeslip?
I think you need to road trip it down to Virginia. Or at least add me, along with Rick, to the list of want-to-sees at Carlisle.
Congrats on a car well-done
Thanks Dan! There are not tracks near by so no plans to run it. It’s not setup for the quarter mile anyway. I like longer trips, so its more setup for highway performance than just brute low end acceleration. Overall it pulls hard down low and now doesn’t run out of breath beyond the mid range so it pulls into higher RPM nicely. I am happy with the performance.
And yes, you’d definitely be on the list if I make it down to Virginia or Carlisle.
Sounds really healthy!
Well done. Congratulations on a very professional approach and amazing results. Thank you for sharing.
I appreciate the information on the engine, as it’s a misunderstood beast, an excellent engine but compromised when built, to meet 70s emissions standards at a low cost.
Kudos on an excellent job! I’ll bet that 400 will be a real pleasure to drive now. And just how many Canadian cars would be that nice and rust-free after that many years. How lucky for you that your father went car shopping in 1972 and not in, say, 1975. 🙂
True, although I did end up with his 1976 Malibu as well! I also am kind of glad that his first really nice car, his ’65 Chev Impala, rusted out. l really like the ’65 Impala, but I wouldn’t have wanted a 230 six powered one. He learned a lot from owning the Impala, which is why he did a much better job at preserving the Torino.
Wow; this is what I should be doing to my ’66 F100, but you’re a much better man than I am. 🙂
Really impressive to see how this car has escaped the tin worm in Canada all these decades.
Thank you. Puttering away with little projects on the ’66 F100 would be a lot of fun. 🙂
Nice work! I don’t want to think how many hours were spent cleaning off all that undercoating and just how dirty that work was.
Amazing. It’s hard to say which is more impressive – your handiwork or your Torino being so rust free. You’ve tackled a project that most will shy away from.
Enjoy that 400. And 15 mpg sounds great – the ’73 Torino my parents bought new had a 302 and achieved a routine 12 mpg. Your 400 is doing 25% better so it’s an economy engine in comparison!
Thank you. It is amazing how rust free dad was able to keep this car, especially considering how badly these cars rust. Even today, his cars are still meticulous.
I am okay with 15 MPG (US), but I think I might be able to get a bit better. At the end of the day though, I really am not that concerned about this cars fuel economy. Your parents Torino was pretty bad, especially for a 302. According to Dad’s old fuel economy records, he could got a best of around 17-18 MPG (US) on the highway when it was all stock and relatively new. But 15 MPG (US) was more typical.
There is nothing wrong with 15 mpg in a car that goes like stink and runs on pump gas. There’s never been a payment and you can do your own work.It doesn’t matter how much fuel it uses.
The 434 in my Lincoln is also bored out .0.03 and this comes to almost 440 cubic inches. No way I am doing 15 mpg. It’s more like 10 but the Mk V is a real ocean liner.
Amazingly, I put TMyer stroker kit in my buddy’s 1979 Lincoln Mk V. I also added Australian heads and a relatively sedate camshaft. There is one 650 CFM Holley carb, and a lot of other go fast stuff.
I wanted the care to have monster torque, while the horsepower was a secondary consideration. I got 410 lb/ft at 1600-3000 RPM and 365 HP at 4000 RPM. These are real numbers off a dyno, not a guy’s imagination.
The numbers don’t describe how fun this car is to drive. The torque comes in like crazy at low speeds, making it an absolute hoot to drive. I can imagine how well your car goes as it is so much lighter.
I recall you talking about this big Lincoln before. It would need those cubes to move it around with authority. Initially I was just going to order the parts from Tim and do the build. But after starting to talk to local machine shops, I wasn’t confident in the their ability to do proper machine work, especially on the heads, the conversion to a roller cam, the installation of the special cam bearings and the other mods to the oiling system. By the time I shipped it out to Tim to do the machine work, the long block assembly wasn’t really much more money. Tim wanted to do the full build and dyno the engine, but that was too expensive and I wanted to do some work on it. So no dyno run on the engine, but based on many other similar builds and Tim’s extensive experience running engines on a dyno, I am confident it’s making plenty of horsepower. 🙂
That is exactly how I would do it as I know no other way. OCD is a blessing in these situations. It is how I did my Mustang, the Polara, the Park Lane is coming up and the 65 F-100 just to prod Paul. To prod Paul even more the new rebuilt 390 for my F-100. I should probably write up the trucks return back to stock between 2008-2014.
Impressive work, I like the empathetic build, if that is the term.
I have a soft spot for the Torino, especially the ’72 with the paint fade stripe like yours has. Friends of my parents had one from new, in green like the one Eastwood drove in the Gran Torino movie. I got a few rides in it and thought it was very cool.
I remember doing pre-delivery inspections on new ones at our Ford garage. Your rebuild looks a lot better than anything the factory was sending. NICE WORK!
Amazing how much better it looks now as compared to the ‘before’ picture.
Love it! Love it! Love it! Vince, you have a great car with family history and great skills. Great patience, too. Love it all!
Props to You Vince! (Standing slow clap) If you take all the work I’ve put into cars over the last forty years and rolled it into one, I don’t know if I could equal what you’ve done!
Thank you all for the kind words. This project was a lot of work, but really enjoyable. Here is hoping for another 48 years if service.
What a great job you have done on this beauty. And the family history and keeping it rust free all these years is amazing.
Great write up, I don’t think I would ever have the ability or ambition to do a project such as this. She should have another 50 years of pampered service in her now.
the engine compartment looks much better, and more original, with the black distributor cap and black spark plug wires. I think every young hotrodder used yellow wires, Accel possibly, at least once in their lifetime. I know I did in 1974 and looking back on it I can now ask what was I thinking. Also one of those universal radiator hoses which I actually hate.
Thank you. Isn’t that true about the Accel wires and other ignition parts. I put those on there years ago doing a tune-up, but it wasn’t really because I thought they would be an upgrade. It was just at that time, all the over the counter wires sets made for the engine fit terribly, so I decided to make my own wires. The only set I could find at the parts store where I could custom make the wires was those Accel wires. Black was essential for the new wire set. The new set are Taylor wires, which are very good quality and have a stock look.
Being cursed regarding originality I used correct Autolite wires with the correct ink markings for a 1968 Ford product.
What a great car! What a great post!
’72 is my favorite year Torino. I didn’t pay any attention to them until a man who worked at my dad’s store bought a ’72 Ranchero GT. It was the same color as your car, and had the same wheels and stripes.
Both he and the car are long gone, but I’d love to have another one. Especially if I could find one with a 4-speed…
Very impressed Ford Guy here: the careful, high-quality work done by you and the pros, the great photos and storytelling. Yeah, 1972 is right before the emissions (and gas price) curtain starting descending; I’ve gotta believe that makes your car easier to work with than one a few years newer (thinking of vacuum hoses and smog pumps and all that).
The family connection, of course, is the priceless cherry on top of all this .
BTW, can you see any of the date codes on the engine castings–something like 1K24 or 2D22? I may possibly have worked at the Cleveland Foundry when yours were produced…
Bravo once more for a fine and worthy project, and for letting us all share!
BTW (as an American) I’d love info about the winter oil-spray thing; seems more prevalent in CA than US, but I may well be wrong.
Thanks George. Yes, being a 1972 it was relatively straightforward to work on. The 400s without A/C used in 1972 had very minimal emission controls, basically just the transmission controlled spark advance system (which was disabled many years ago when my dad owned the car).
When I had the engine out, I documented all the casting and dates codes. The engine was cast in February of 1972. Ford stamped a lot of date codes on this car, almost all of them are February or March of 1972. The car was assembled on March 28, 1972.
The oil spray is a life saver up here in salt laden Canada. Dad was an early adopter of Rust Check, then later switch to Krown. He has used Corrosion Free for the last few years on his Camry and it seems to be as good as the others. I have pretty much exclusively used Krown on my cars for over 20 years, because the local dealer is good. The concept is the same regardless of brand, a light oil gets sprayed inside body cavities and on the undercarriage. This oil coating prevents corrosion. It really does make a huge difference to keep the rust off the car, but having oil everywhere makes it really messy.
Can’t wrench to save my life, but I had to tune in just for another glimpse of that super handsome beast.
I’m always in awe of fellows who can do this level of work and it’s just their hobby. Amazing, Mr C.
The film of the motor on the test-bed thingy was most helpful to me, clarifying something I’ve long misunderstood. I have always assumed that pushrod V8’s achieved the crossflow effect the same way as pushrod crossflow fours, with one pushrod straight up, the next on an angle through the head (like Peugeot and some Toyotas). Not so! Just a mild offset, and the flow is really as much down the length of the head as it is through.
One question from this great piece, what is “deck clearance”?
Thanks Justy! I am glad the videos help you.
Deck clearance is the space between the top of the piston and the top of the cylinder deck when the piston is at top dead center. You don’t want too much clearance there as it will basically cause the combustion chamber to not work properly. It creates too many “dead spots” where you can have uncontrolled combustion – which is detonation. The Ford engineers created excessive deck clearance to reduce compression on the 400 engine rather than design a head with a bigger combustion chamber. It was half-assed and a compromised design.
Thanks, Vince. The internets instantly got too technical for me, this does it.
I really like your philosophy re the engine rebuild–fix the known shortcomings without going for the utmost power. Presumably it’s the engine Ford engineers would have designed if they hadn’t had to answer to the bean counters.
Great work on this beautiful car Vince, I also read and greatly enjoyed your original write ups on the story of your car and family – absolutely amazing! Dad and Son car bonds are very strong indeed!
Thank you for sharing and keep up the great work – wish you many more years of enjoyment with this car!